【Power Automate】Box上のファイルを自動的にPDF化するフロー
sanane SANANEBLOG

In this article, I’ll walk you through the steps for granting access permissions when prompted in Google Apps Script!
Google Apps Script (GAS) is a JavaScript-based platform that lets you extend and automate Google services such as Google Drive, Gmail, Google Calendar, and Google Sheets through code.
With GAS, you can automate everyday tasks — from organizing Gmail automatically to analyzing data in Google Sheets — boosting your productivity in countless ways.
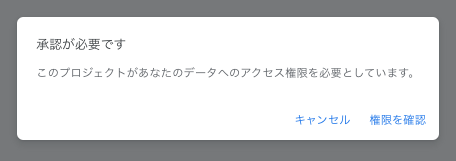
However, when you create and run a GAS script for the first time, a popup saying “Authorization required” (or “Authentication required”) may appear.
This popup appears because the script is requesting permission to access your Google account, and because several steps are required to complete the authorization, it can be confusing for beginners new to GAS.
This article explains how to grant access permissions step by step.
This popup appears when a script is requesting permission to access your Google account.
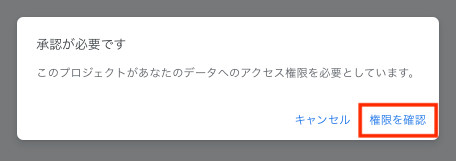
When a popup saying “Authorization required” appears after running your script, click “Review permissions” to proceed.
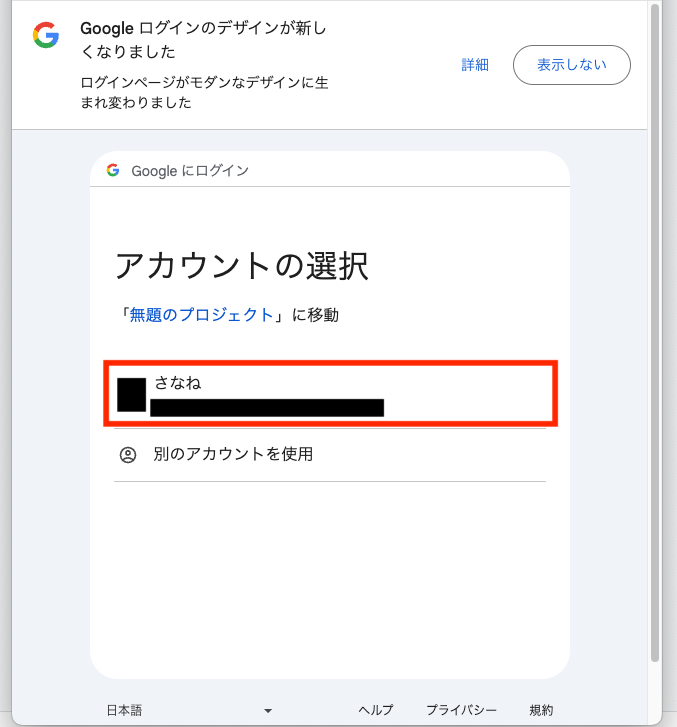
You will be taken to a screen to select a Google account.
Click the account you want to use. If needed, log in with the Google account you intend to use.
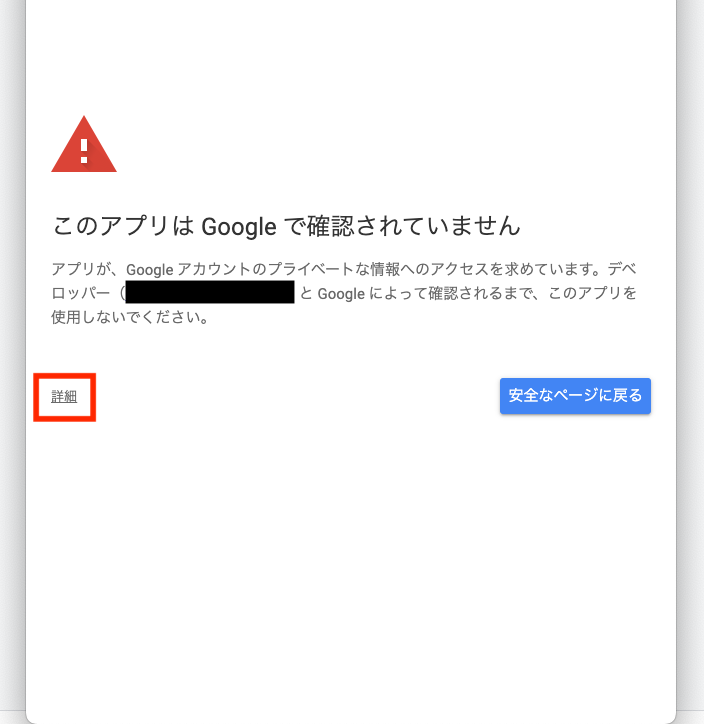
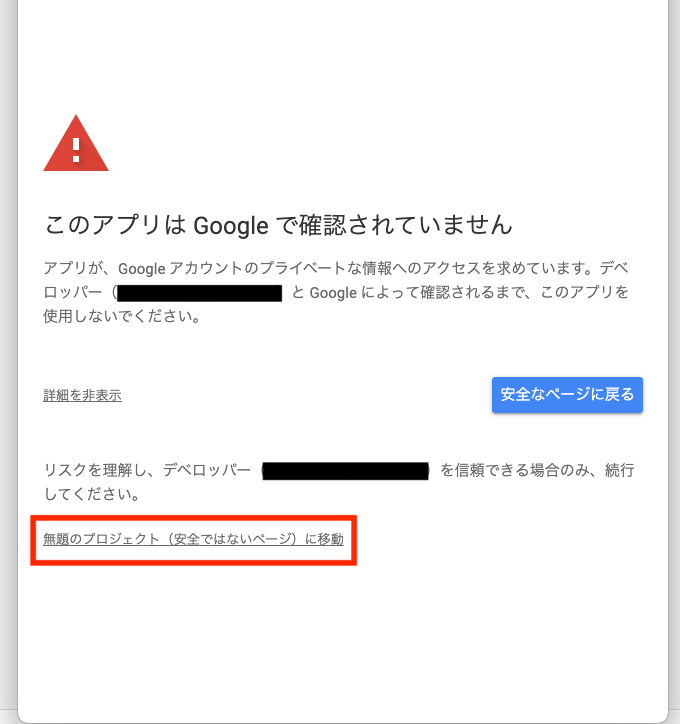
Click “Advanced” on the warning screen that appears.
After clicking “Advanced”, click the “Go to [project name] (unsafe)” link that appears below.
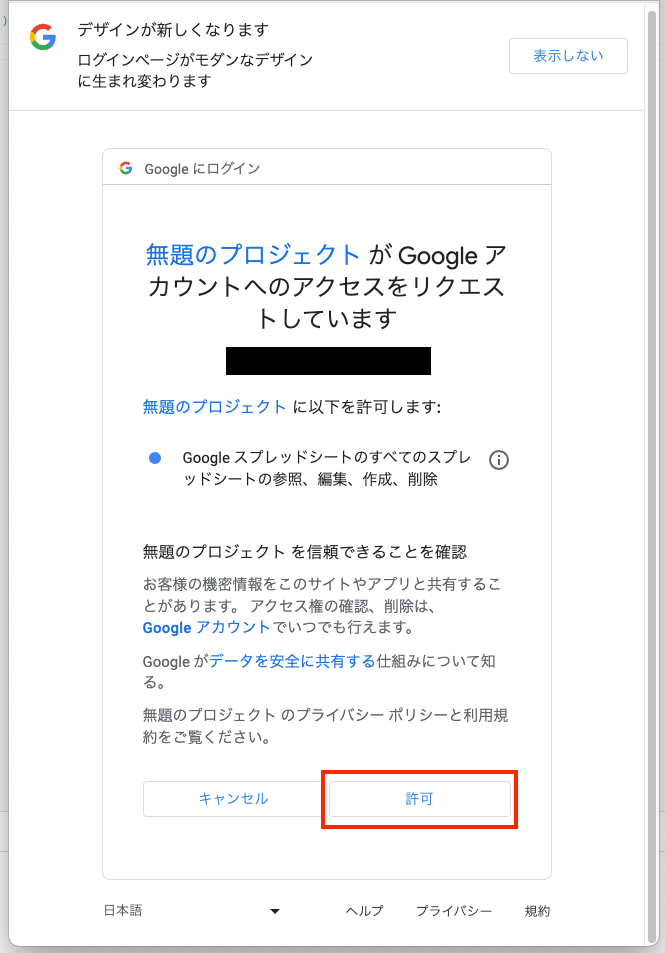
If you are satisfied that the permissions are appropriate, click “Allow”.
In some cases, you may need to check each listed permission and then click “Continue” before the “Allow” button appears.
Once authorization is complete, the script will execute the tasks it was designed to perform.
Your browser’s popup blocker may be preventing the authorization dialog from appearing. Check your browser settings and adjust them if necessary.
Depending on the account you selected in Step 2, GAS may not have sufficient permissions to use Google services, and the script may not behave as expected even after authorization. In most cases, select the account that is actively logged in to the Google services your script uses.
Google Apps Script is a powerful automation tool, but when you encounter the “Authorization required” message, it’s important to proceed carefully through the authorization process. I hope this article helps you use Google Apps Script safely and efficiently.