Have you ever wanted to integrate Google Forms with Google Calendar for more efficient schedule management?
This article introduces a tool that automatically creates Google Calendar events based on date and time data collected through Google Forms.
We’ll walk you through how to set up the tool, its features, and the benefits it provides.
SANANE
This tool is provided for free. You can download it and start using it right away.
It makes it easy to streamline your workflow and share schedules with your team, so give it a try!
Features
This Google Apps Script (GAS) tool offers the following features:
Automatic Google Calendar event creation from Google Forms responses
When a form response is submitted, the tool automatically creates a Google Calendar event based on the date and time data.
Events include the title and response details, making schedule management and response tracking easy.
Automatic Google Forms creation and Google Sheets linking
This tool automatically creates a Google Forms template and links it to Google Sheets, so you can get started quickly even without any GAS knowledge.
How It Works
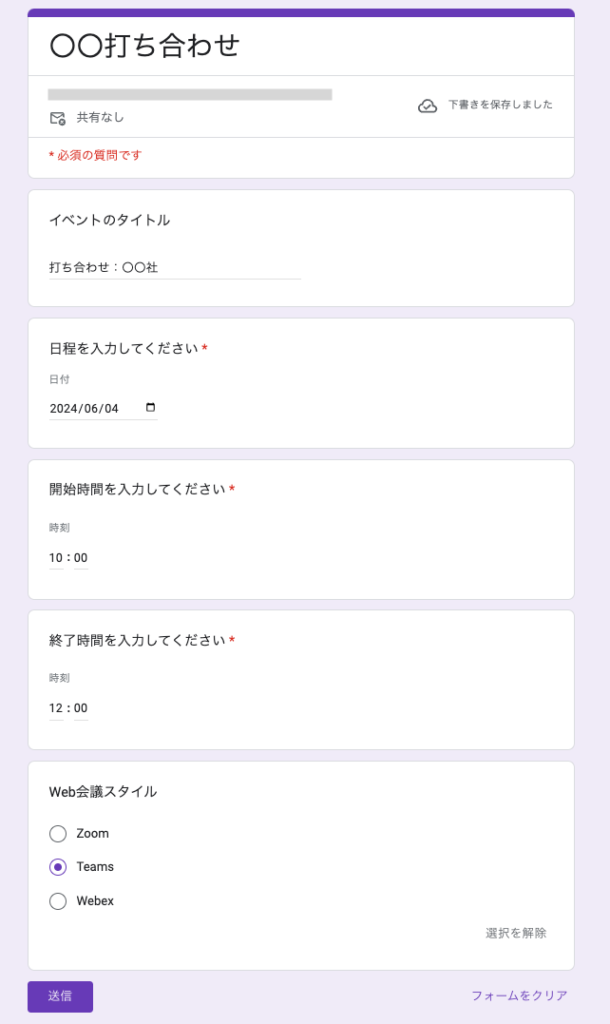
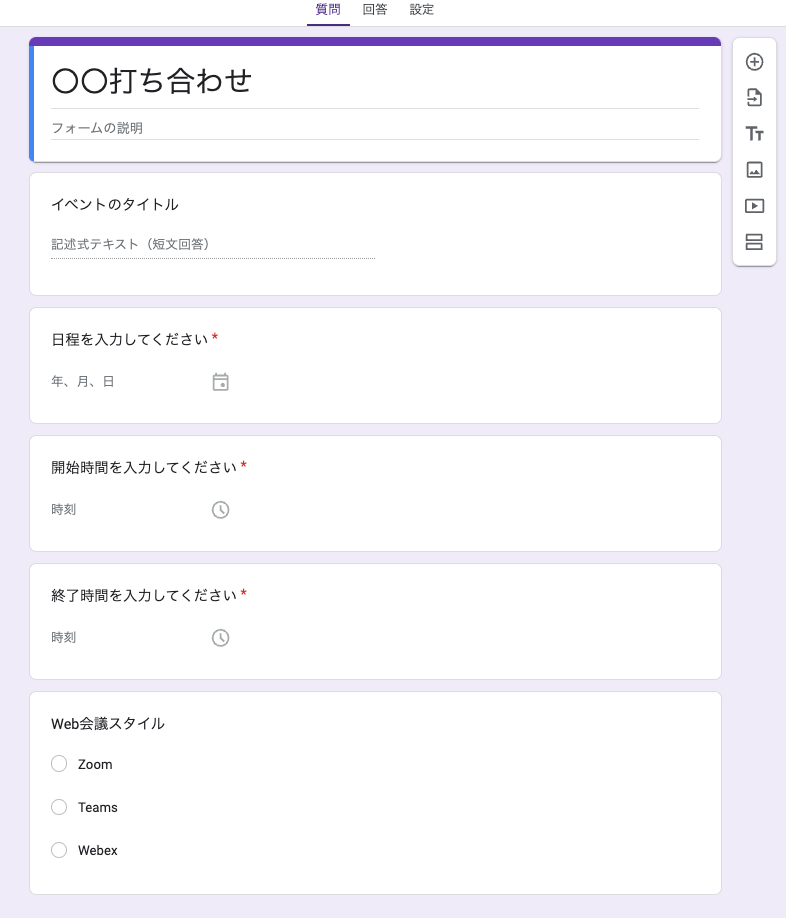
For example, suppose you have a meeting scheduled on June 4, 2024 from 10:00 to 12:00. You would fill out the form as shown below:
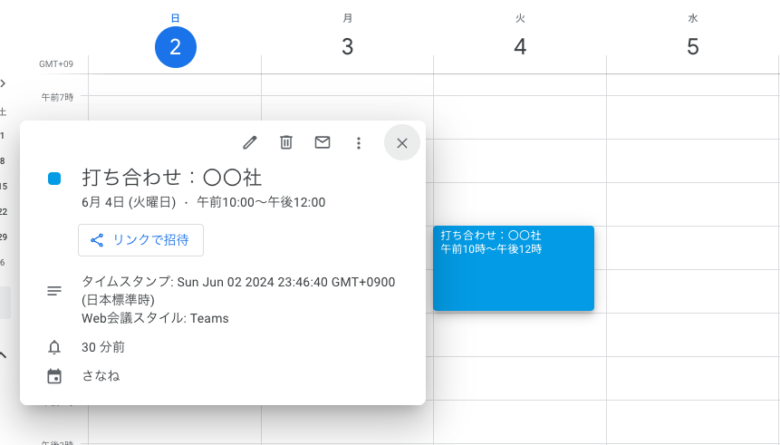
Once the form is submitted, an event is automatically created in the specified Google Calendar for the time slot you entered.
SANANE
The response details are also included in the created calendar event.
Benefits
Using this tool provides the following benefits:
Reduced manual work
No more manually entering form responses into a spreadsheet and creating calendar events.
Automation prevents mistakes and significantly improves work efficiency.
Customizable settings
You can freely configure the question order, so even if the form question order changes, the tool will continue to retrieve and process the correct data.
Easy setup and use
Getting started is very simple — just configure the necessary settings from the custom menu.
Setup Instructions
STEP 0: Access the Tool Link
Access the tool using the link below. Follow the instructions in the tool’s built-in manual or the steps in this article to complete the setup.
Confirm that a form named “Google Calendar Integration Form Template” has been created.
STEP 4: Customize the Google Form
Feel free to edit the created Google Form template as needed.
Do not delete the “Date”, “Start Time”, and “End Time” questions, as they are required for creating calendar events. (You may edit the question text.)
You can change the form name and reorder questions freely. Adding a question for the calendar event title will make it easier to identify events once they are created.
STEP 5: Register the Calendar ID
Calendar ID Registration Steps
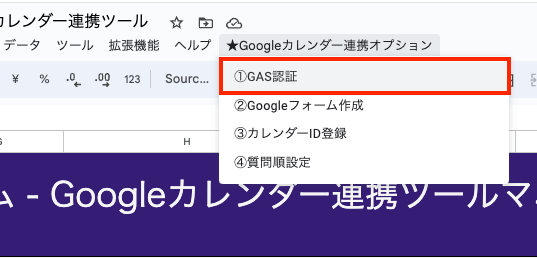
Click the custom menu “Google Calendar Options” in the top menu of the spreadsheet.
Click “③ Register Calendar ID”.
A dialog box will appear. Enter the Calendar ID and click “OK”.
For instructions on how to find your Calendar ID, refer to the following article:
You must perform this step every time you change the question order or question text, regardless of the initial setup.
The tool’s script references which question number corresponds to “Date”, “Start Time”, and “End Time”, so you need to register the question order in advance.
Follow the steps below to register the question order:
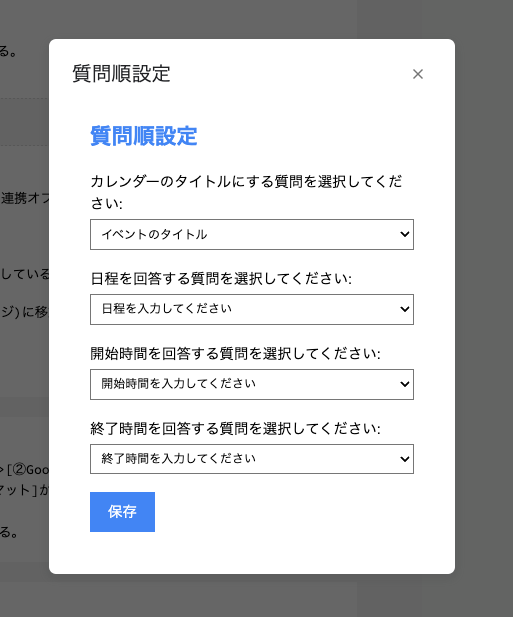
Question Order Registration Steps
Click the custom menu “Google Calendar Options” in the top menu of the spreadsheet.
Click “④ Configure Question Order”.
A modal dialog will appear. Use the dropdown menus to select the form question that corresponds to each required field.
Click “Save”.
The initial setup is now complete.
From now on, simply share the Google Form you created. Whenever a response is submitted, an event will be automatically created in the specified Google Calendar.